Using the QGIS Raster Calculator
The raster calculator allows you to perform mathematical operations on each cell in a raster. This can be useful for converting and manipulating your rasters. Operators include:
-
Mathematical (+, -, *, /)
-
Trigonometric (sin, cos, tan, asin, acos, atan)
-
Comparison (<, >, =, <=, >=)
-
Logical (AND, OR)
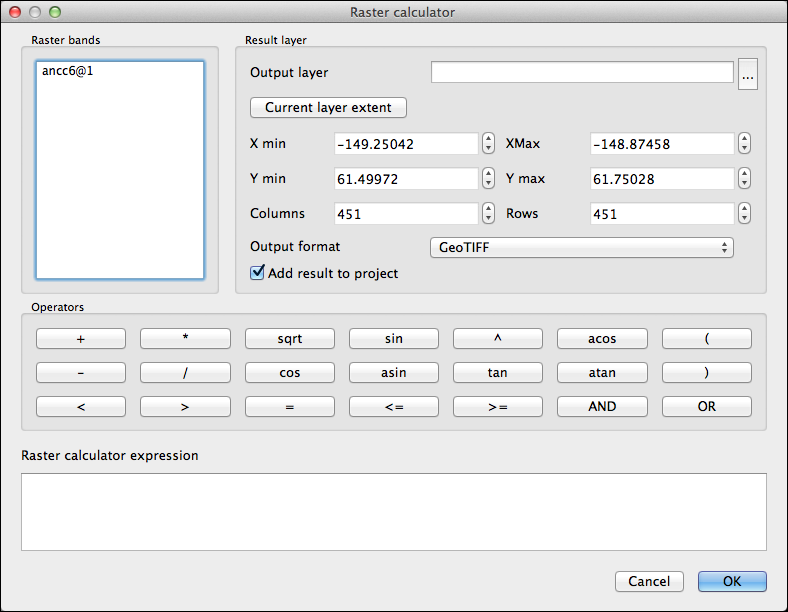
To perform operations on a raster or rasters, they must be loaded in QGIS. The raster calculator is accessed from the Raster menu and brings up the dialog:
Let’s look a few examples.
Simple Mathematical Calculation
Doing a simple calculation is easy. In this example we have a Digital Elevation Model (ancc6) loaded in QGIS. The DEM contains elevations for a 1:63,360 quadrangle in Alaska. The coordinate system is geographic and the elevation value in each cell is in meters. If we wanted to create a raster with elevation in feet, we can use these steps to create the expression:
-
Bring up the raster calculator
-
Double click on ancc6@1 in the raster bands list to add it to the expression
-
Double click the multiplication operator (*)
-
In the expression box, type in the conversion factor for meters to feet: 3.28
This gives us the following expression:
ancc6@1 * 3.28
To complete the process, we specify a name for the output raster and the format we want to use. When you click OK, the operation will be performed and the new raster created, giving us a GeoTIFF with cell values in feet. If you leave the Add result to project box checked the output raster will be added to QGIS once the calculations are done.
If you only want to operate on a portion of a raster, you can use the extent setting to limit the area included in the calculation.
Using a Mask
Sometimes you might want to mask out part of a raster. An example might be one where you have elevations ranging from below sea level to mountain tops. If you are only interested in elevations above sea level, you can use the raster calculator to create a mask and apply it to your raster all in one step.
The expression looks like this:
(my_raster@1 >= 0) * my_raster@1
The first part of the expression in parentheses effectively says: for every cell greater than or equal to zero, set its value to 1, otherwise set it to 0. This creates the mask on the fly.
In the second part of the expression, we multiply our raster (my_raster@1) by the mask values. This sets every cell with an elevation less than zero to zero. When you click OK, the calculator will create a new raster with the mask applied.
Simulating a Rise in Seal Level
Using the raster calculator and a mask we can visually simulate a rise in sea level. To do this we simply create the mask and overlay it on the DEM or perhaps a DRG (topographic) raster.
The expression to raise sea level by 100 meters is:
ancc6@1 > 100
The output raster contains cells with either a 0 (black) or 1 (while) value:
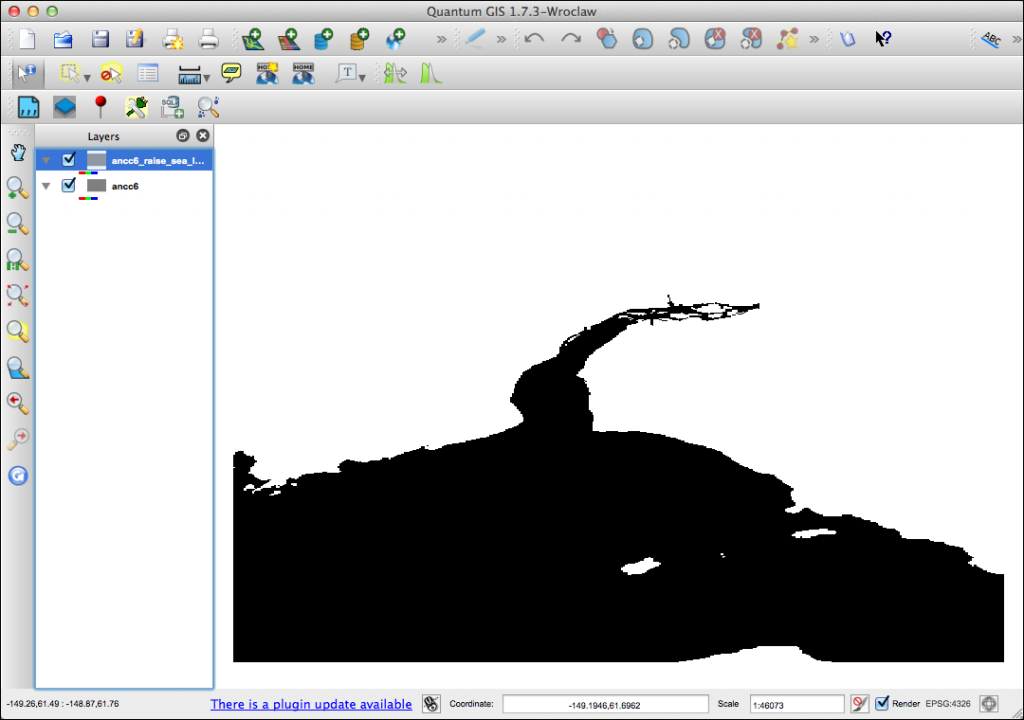
The black areas represent everything below an elevation of 100 meters, effectively illustrating a sea level rise. When we combine this with a suitable background we can demonstrate the results:
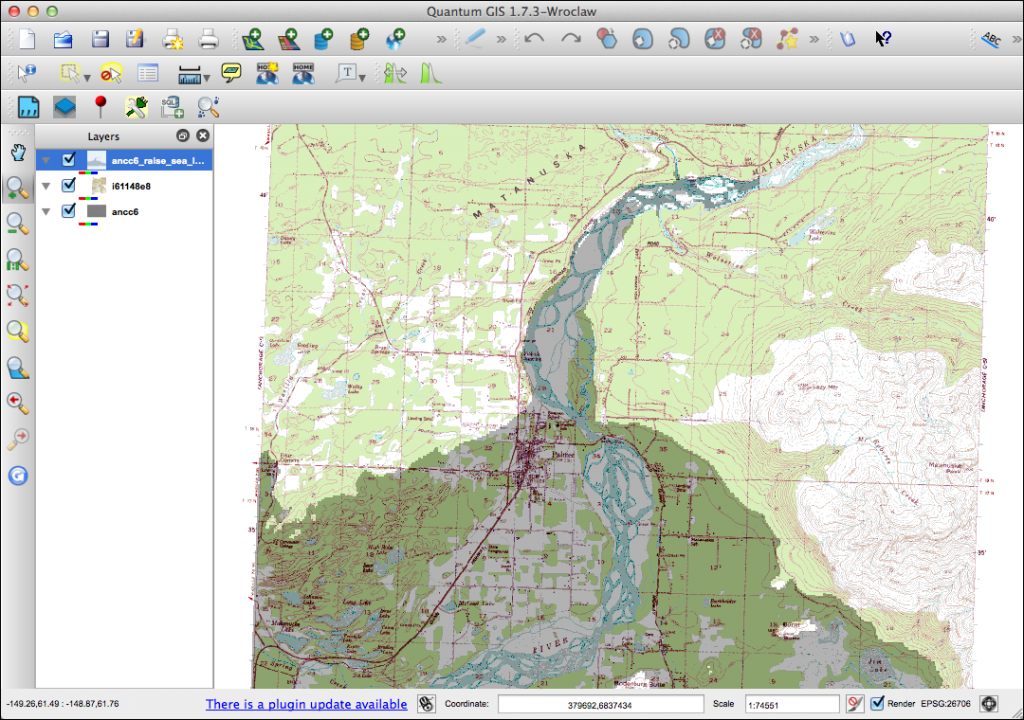
We added the DRG for the quadrangle and overlaid it with the mask layer. Setting the transparency to 70% allows the DRG to be seen, illustrating the effect of raising sea level.
The raster calculator is a powerful tool. Check it out and see how you might use it in your analysis and map making.